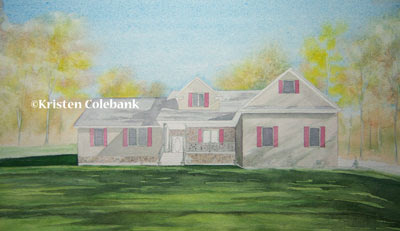
These are the first washes I applied after transferring the grid drawing to my watercolor paper using my light box.
I struggled with the foreground, given the sense of slope, and all the shadows. My first attempts looked awful, with squiggly shapes dominating everything. It was too busy, mostly resulting from my attempt to freelance those washes. I ended up scrubbing nearly all of the foreground away, and starting over (I'm so glad that Arches paper is durable).
My next attempt at the foreground started with some light pencil outlines of the main shadow shapes, and followed by careful application of paint in those areas with a smaller brush. Experts always say you should use as large a brush as possible, but I always get into trouble when I try to work that way. So I fell back to my dependable No. 6 round, and softened some of the shadows' edges as I worked.
When that dried, I applied additional washes over the lawn, darkened some areas of the shadows, and scrubbed away some other areas to soften the edges. Thank goodness the area seemed to come together this time.
The background was completed by wetting the entire upper half of the paper, excluding the house shape, and applying Cerulean Blue for the sky. Then, while that was still wet, I dropped in mixtures of Cad Yellow, Burnt Sienna, and Hookers Green to create soft blossoms of foliage. Some of the tree trunks were masked out prior to the wash applications.

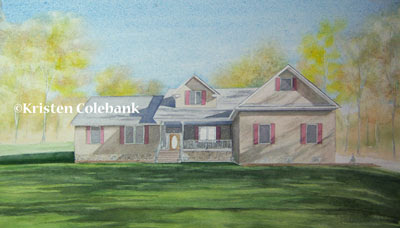
Next, I continued to define shapes within the house, particularly with the first shadow washes. I mixed the shadows on the siding with a host of pigments....can't completely remember what I used now, but I struggled to keep them somewhat warm so they would mesh with the siding. I also worked hard at trying to vary the density and edges of shadows on the right section of the house that were cast by nearby trees. Variations there were necessary to make the shadows realistic.

No comments:
Post a Comment